Street Photography: Top Tips, Tricks and Advice for Black and White images

I took my best ever street photos recently while walking around Manchester and I learned some key tips and tricks for taking dramatic, moody black and white photographs. I’ve put my best advice in the video tutorial shown above, but I’ll take you through these easy tricks here too.

1: Travel light

I shot my images on the Sony RX1R, a superb, full-frame compact camera that’s small enough to fit in a jacket pocket. Its small size means I can always have it ready to shoot whenever I see an opportunity. But it also makes it more inconspicuous and doesn’t draw attention like a big DSLR might.

My favourite street photos are candid moments, where the subject is just going about their day. By using a small camera I can take these shots without making anyone feel uncomfortable. Instead, I just look like any other tourist taking photos of the city.

2: Shoot in black and white

I change my in-camera image profile to black and white, with extra contrast. It allows me to visualise my final image more easily, being able to see exactly how the light and contrast will look without the distraction of colour.

I shoot in RAW and JPEG, which means I can see that original JPEG file in black and white to remind me why I liked the image, but still giving me the flexibility of a raw image. Often I’ll prefer the look of the JPEG anyway.

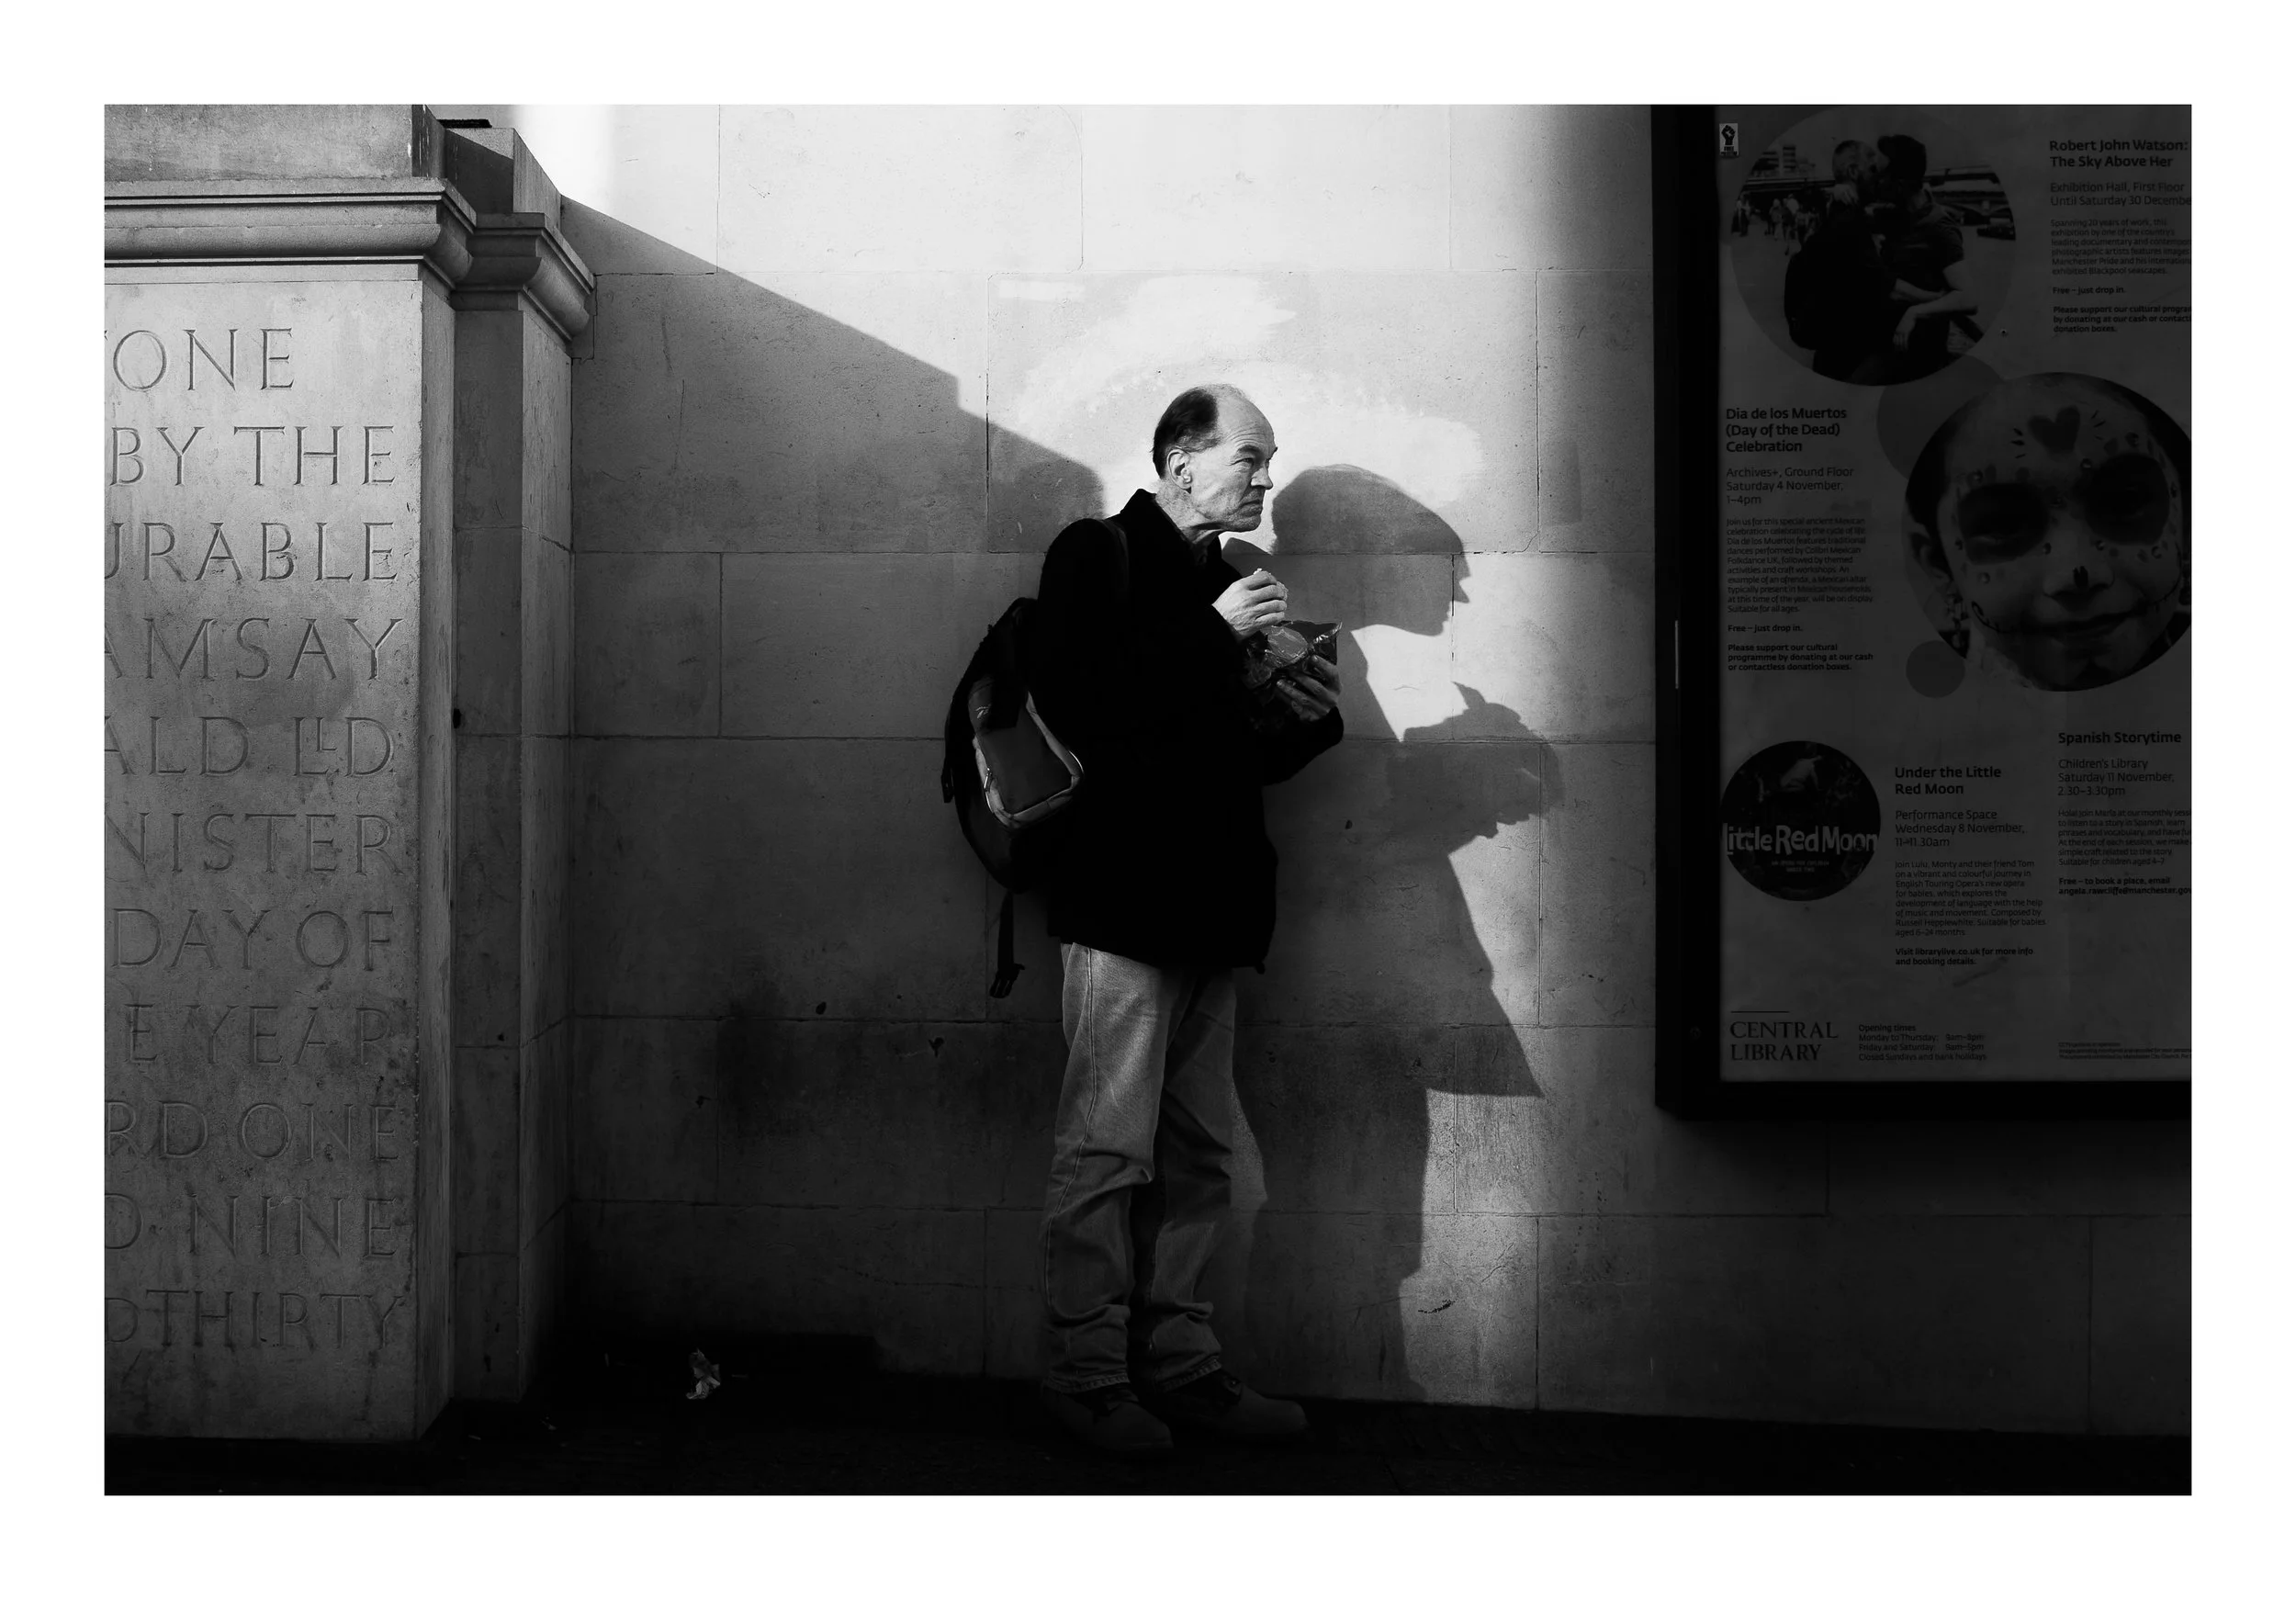
I waited for about 15 minutes for someone to enter this scene. I’m pleased my patience paid off.

3: Patience is important

My instinct is often to walk around a city, looking around and hoping to spot a photo opportunity. This often doesn’t work. Instead, I’ve learned to be patient and wait for images to come to me.

Sometimes I’ll linger in busy areas, where people are coming and going. I find that by just watching everyone I start to become more attuned to my surroundings. Other times I’ll find a great composition that needs that extra human element and I’ll hold my position waiting for someone to enter the frame.

4: Be bold, but not too much

I’ve always felt nervous taking photos of people on the street, as though I’m being rude or intrusive and I suppose to an extent I am being. But I’ve learned to recognise more occasions when I can get the shot I want but I’m not putting anyone in a difficult situation.

I didn’t want to make this lady feel uncomfortable, so I shot from more of a distance. But it was also in a very busy, very public area, so I was confident she wouldn’t feel threatened by my presence. She actually loved the photo and told me how much the pigeons love her.

I’m a 6 foot 2 man, so I’ll always avoid doing anything that could seem threatening — putting a camera in a woman’s face, for example, would be an awful thing for me to do, and I always avoid photographing children, for obvious reasons. It’s another reason why taking images in busy areas is good as it means I’m unlikely to make anyone feel ‘targeted’.

5: Practice makes perfect

It’s true of so many things, but I’ve really found it to apply to street photography. It’s not just about learning the mechanics of taking an image (balancing exposure, shutter speed and whatnot), but it’s about training yourself to ‘see’ images.

The more I’ve gone out to try and take street photos, the more I’ve been able to recognise opportunities, or spot compositions I want to explore. I see potential images in a way that I simply didn’t do when I started out taking street shots. Almost every time I’ve gone out I feel I’ve improved my photography and it makes me extremely excited to go out next time.

You can see the full gallery below.

How to Use Off-Camera Flash for Macro Photography - and Why You Should

Flash lighting for macro photography can make all the difference in taking amazing photos, but often working with flash can feel like such a huge learning curve. And while it’s easy to put a flash on your camera and fire it forwards, you’ll get your best results if you take the light off camera. In the video tutorial above, I show the difference off-camera flash can make in your photography and how to go about using your flash off camera.

Subject lit with on-camera flash

In this first example, it’s clear to see how harsh the light looks when the flash is positioned on camera. As it’s hitting the subject straight in the face it gives a very overpowering look that eliminates all the shadow detail and creates a very underwhelming image.

Subject lit with off-camera flash

But by moving the flash only about 12 inches to the left it’s given direction to the light, producing a more artful-looking image that uses shadows to define the form and add mood.

In most of my photography I work with Godox flashes, including the AD100 Pro and AD200 Pro. I use these wirelessly with my Canon R5 using the Godox X Pro-C trigger. If you already have a flashgun and you want to use it off-camera, then you can get a cheap off-camera shoe cord that simply connects your camera and flash with a short cable, letting you hold your flash and fire it at whatever angle you want.

In the video, I explain how I balance flash power with my camera settings, and how to use shutter speed to increase or decrease the ambient light in the image.

But remember that using flash off camera is an aesthetic choice, like everything else in photography. It’s not a ‘better’ or ‘worse’ approach, it’s just the way I personally like to work as I love a more moody look in my images that makes use of shadows. Many macro photographers rely on on-camera flash using light cones or other diffusers to light up the entire scene to avoid shadows. If you’ve never tried using your flash off camera then I highly recommend at least giving it a try.

YouTube vlogging with the Blackmagic Pocket Cinema Camera 6K Pro (BMPCC6K)

I usually use Canon or Panasonic cameras to create videos for my YouTube channel but in this video I borrowed a Blackmagic Pocket Cinema Camera 6K Pro (more commonly referred to as the BMPCC6K) to see how far I can push the production on my channel. The video certainly has a different, more cinematic look to it than I’m normally able to achieve, but it was my first time using the camera -- or producing in DaVinci Resolve -- and I’ve learned a lot in a short space of time. These are my key findings.

The footage looks amazing

I shot everything in Blackmagic raw at 5.7K resolution and I love how everything looks. The raw files let me push colours and exposure in post in ways I simply haven’t done with any footage before now. Sure, I might have gone way too far with the grading and it might not be to your taste, but I intentionally wanted to see what sort of looks I could manage with the footage I shot and I’m impressed.

The details are superb and the dynamic range is exceptional. I understand why this camera is so beloved by filmmakers.

It’s slower to use, and that’s good

The camera lacks some features that I’ve become quite reliant on in my vlogging, most notably tracking autofocus and image stabilisation. While hand-holding the BMPCC is doable, you’ll need a steady grip and ideally a shoulder rig or at least side or top handles if you want steadier-looking shots.

My R5 has up to 8-stops of stabilisation which means I can comfortably shoot hand-held while walking or attempt more complex camera movements without a gimbal without worrying too much about violent camera shakes. That’s not the case with the BMPCC. I shot almost all of my footage with the camera locked down on a tripod to ensure it remained steady and holding it up to face height to talk into the camera was out of the question.

I also used manual focus for the whole film, using focus peaking to ensure I got it right, and had to pre-focus on certain zones when I was setting up shots where I’d be in front of the camera. This wasn’t always 100% accurate.

But this also forced a slower, more methodical approach to my filming that meant I spent more time considering every shot before I pressed record. I often have a ‘rough and ready’ approach where I focus more on getting the shot quickly rather than trying to get the best-looking shot. The BMPCC forces the latter and while I certainly spent longer getting all my footage, the result is a much better-looking video.

It’s bigger than I’m used to

I usually shoot on small mirrorless cameras and while I can easily get two cameras and other accessories in a small backpack, the BMPCC requires a much bigger setup for working on location. I used a Smallrig cage and top handle along with a PolarPro Recon mattebox on this shoot, but I will also be using a PolarPro Pivot shoulder rig and rails system, Smallrig V-Mount battery, Smallrig follow focus system and Godox monitor. That’s a lot of gear to carry.

Do I need all of it? Not necessarily, but I’ll be choosing to use the BMPCC only on shoots where I know I want to achieve the best-looking footage and that taking the additional hardware will help me achieve that.

It also means I won’t be using the camera for hand-held vlogging style shots where I hold the camera up and talk into it while I walk. The stabilisation and focus and sheer size of it means it definitely isn’t feasible. However, those shots, while quite classic of quick YouTube vlogs, aren’t exactly the sort of cinematic footage I’m hoping to achieve so I’m happy to exclude those from my shot lists, instead finding more ways to appear within the scenes I’m shooting as I’ve done in the above video.

Battery life is short

In shooting a 15 minute YouTube video I burned through five fully-charged NP F550 batteries, which was all of the ones I took with me and I was concerned I wasn’t going to get all the footage I needed. I was hitting them hard, shooting raw and using the LCD display on full brightness but even so I was surprised at quite how power hungry it is.

I’ve got a Smallrig V-mount battery and have bought a D-Tap power cable to run the camera which will hopefully give me more peace of mind when working on location, but it does mean carrying yet more things around with me.

DaVinci Resolve has taken some getting used to but I’m excited to learn more

I’ve spent the last few years trying to learn everything I can about Adobe Premiere and have only just gotten to a point where I’m happy with the speeds at which I can turn round an edit. So moving over to an entirely different piece of software was a big step.

Resolve seemed quite daunting at first, especially the colour editing and nodes section. The company does have some useful video resources, but I also spent a number of hours on various YouTube tutorials trying to understand the basics and how to replicate my workflow (and keyboard shortcuts) that I’m used to from Premiere.

Once I’d spent some time in the colour editor it did start to make a lot more sense and I quickly found myself enjoying playing around with the colour wheels, creating looks exactly like I’m used to in Lightroom with still images. I’m not quick and I keep making a lot of basic errors I need to fix but I’m looking forward to spending more time with it.

I won’t be using it all the time (but I’d like to)

My YouTube channel is still fundamentally a fun side project for me that I try and do on the side of my actual job. Yet each video takes anywhere between 8 and 15 hours from start to finish which is a huge amount of time to commit to every single week. So sometimes I have to rely on quick shooting and more rough ‘vlogging’ styles of shooting where I can throw a video camera (or even my phone) in my bag and head out.

Other times though I’ll have a certain video in mind that I know I want to commit more time to in order to achieve a better result. And it’s on those videos that I’ll reach for the BMPCC6K and the cinematic quality it offers.